
Deploying .NET Core and Angular applications can be a complex process, especially when you’re managing everything on your own infrastructure. Coolify, a self-hosted platform, offers a streamlined solution that simplifies the deployment and management of your web applications. In this guide, we’ll walk you through the steps to publish your .NET Core and Angular projects using Coolify, ensuring your applications are running smoothly and efficiently on your servers.
We’ll also cover setting up a MongoDB database with the replicaSet option on Coolify, which provides enhanced data redundancy and availability. Whether you’re a seasoned developer or just starting out, this tutorial will equip you with the tools and knowledge to make your deployment process as seamless and robust as possible.
I used Debian 12 as the server operating system. You can use a different Linux-based operating system, but if your home computer or laptop does not have good features and you do not have a lot of disk space, Debian will be just right for you.
I leave the server setup to you and after everything is ready, I will come to how to install Coolify.
First of all, what is Coolify?
An open-source & self-hostable Heroku / Netlify / Vercel alternative.
What makes Coolify selectable for us is its support for Docker.
You can access the website from the link below.
We select the self-hosted option and run the connection required for installation on the terminal screen.

curl -fsSL https://cdn.coollabs.io/coolify/install.sh | bash For installation, connect to your server via SSH or run the above command directly from your server.

As you can see, if we do not run it from the root user, Coolify does not proceed with the installation. For this reason, we need to switch to the root user.
To do this, we use the “su -” command, press Enter and enter our root password.
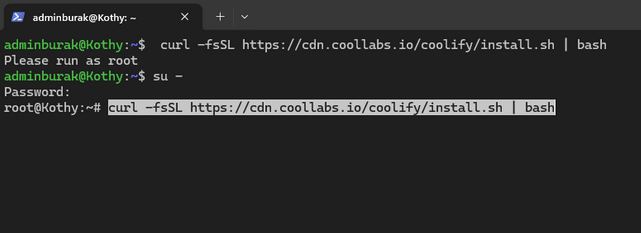
Afterwards, we run the command again with the root user and after a while the installation is completed.
In order for us to connect, our modem will give us a connection to access the Coolify panel via port 8000, but since we have not made any settings from the modem interface, this connection will not actually be accessible. In order to access the portal, we need to use the IP and port starting with 192 that we received from DHCP.
For example: http://192.168.1.XXX:8000
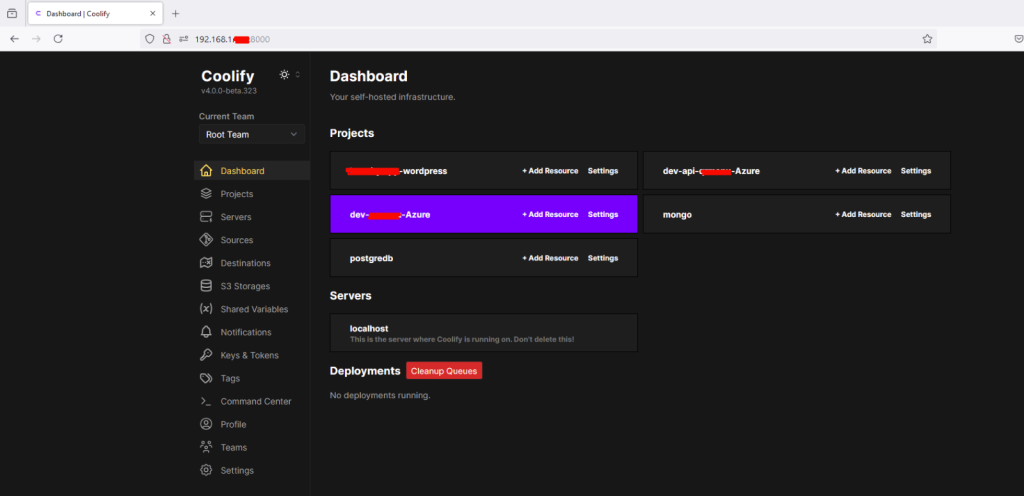
So we can access the Coolify panel.
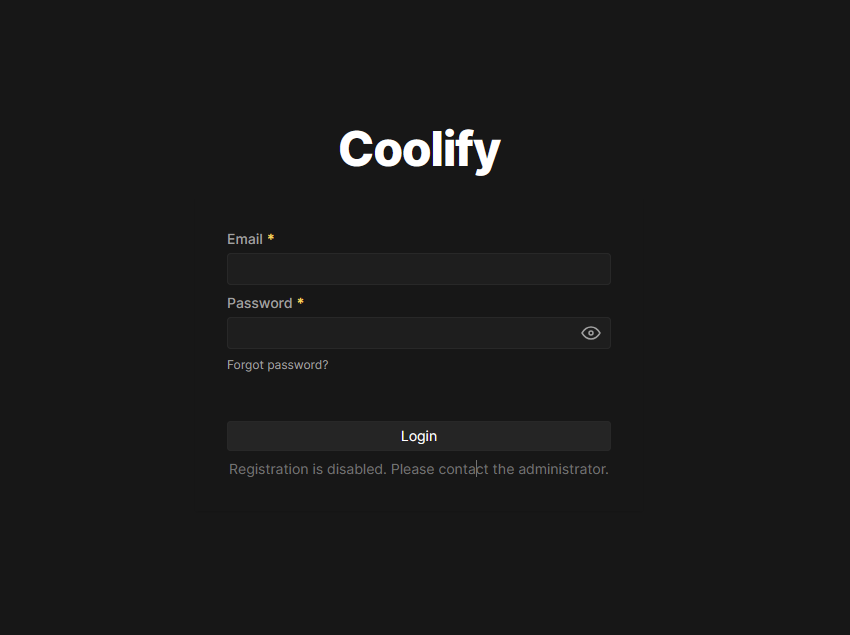
Coolify will ask you for a registration when you first open it. It is important that the information you enter here is information you will not forget because you will need this information to use the portal.
After logging in, you will be greeted by the following screen.
Here we can take a break for Coolify and examine how to set up Cloudflare Zero Trust, which actually makes things a lot easier for us. Because we will be doing things like domain redirects etc. via Cloudflare.
Cloudflared setup and Tunnel settings
To configure Cloudflare, you must first log in with your Cloudflare account and access the portal below.
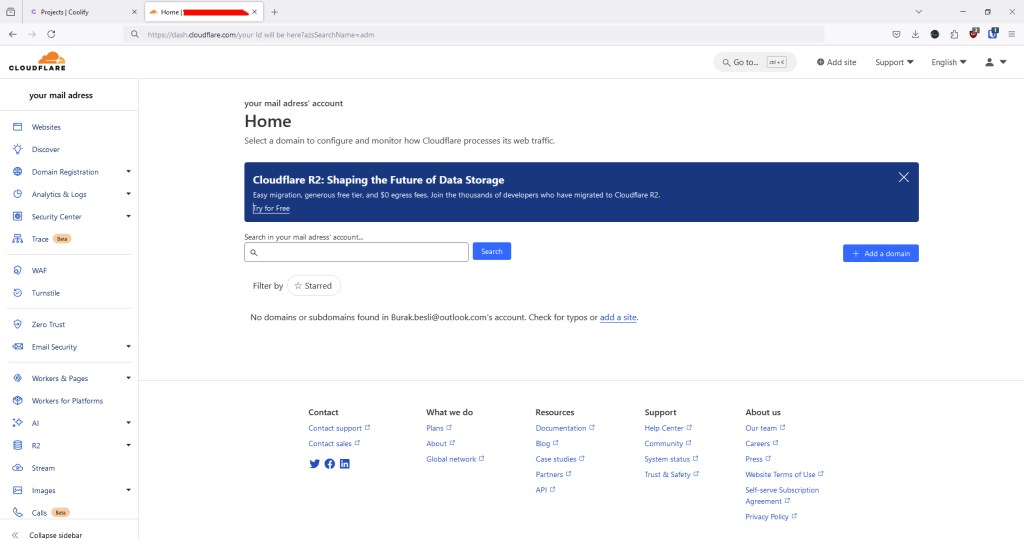
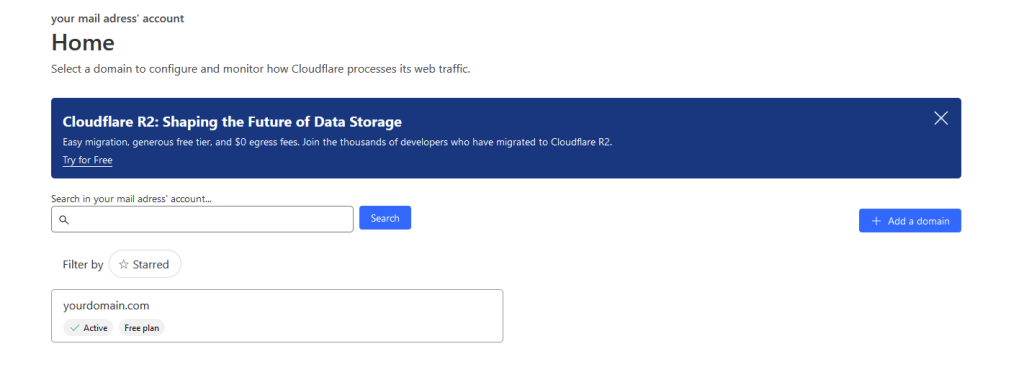
Add your domain and redirect it from the Websites section in the left menu.
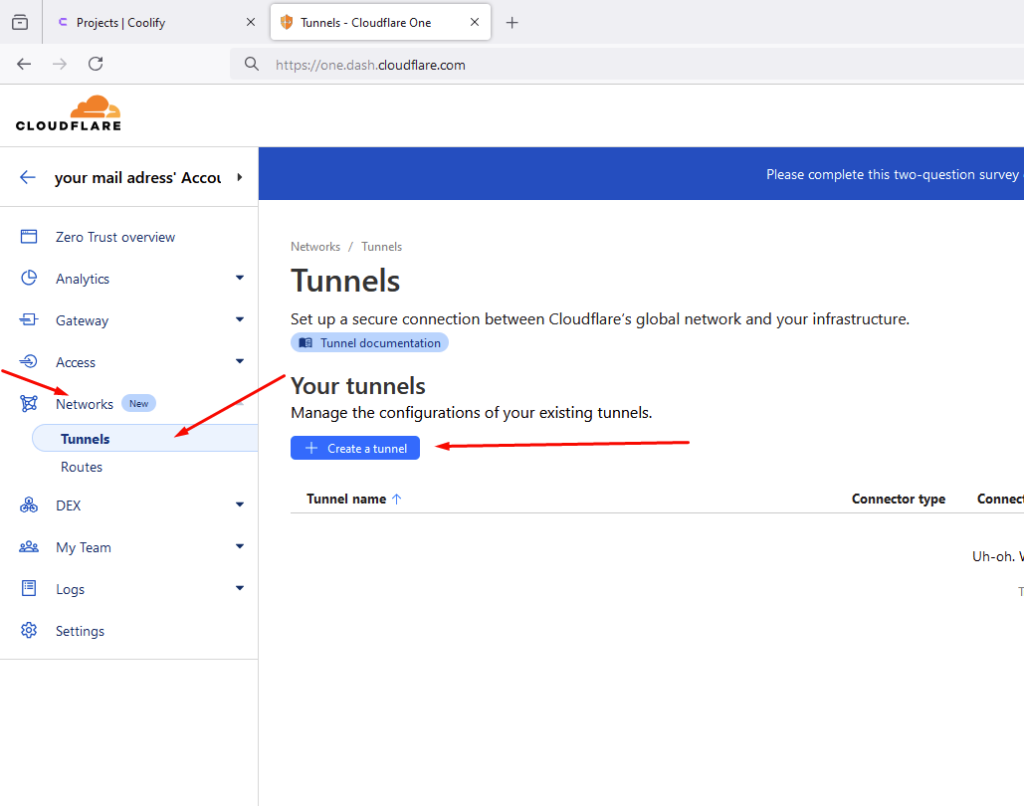
After completing the procedures here, click on Zero Trust in the left menu and access the portal.
In the opened portal, follow the path Networks>Tunnels>Create a Tunnel.
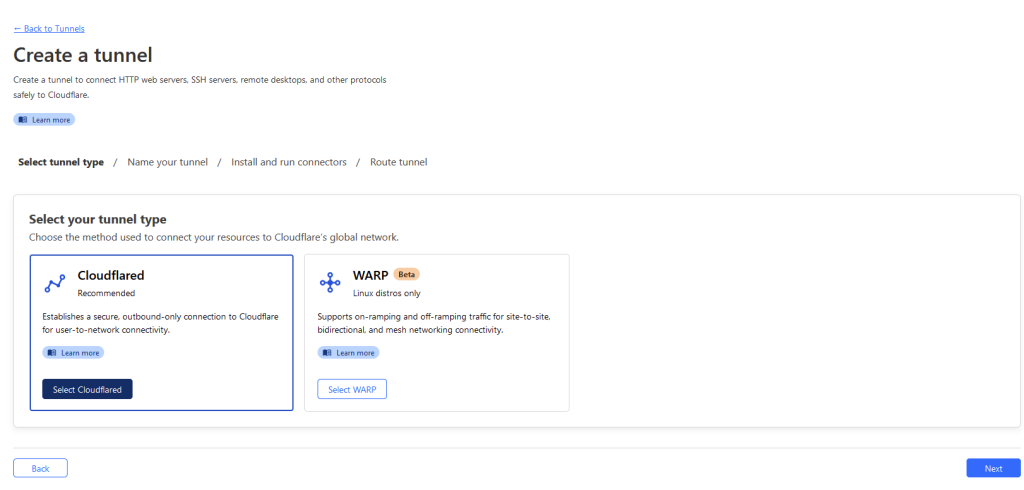
On the screen that opens, the Cloudflared option will be automatically selected. You can proceed by pressing the next button directly.
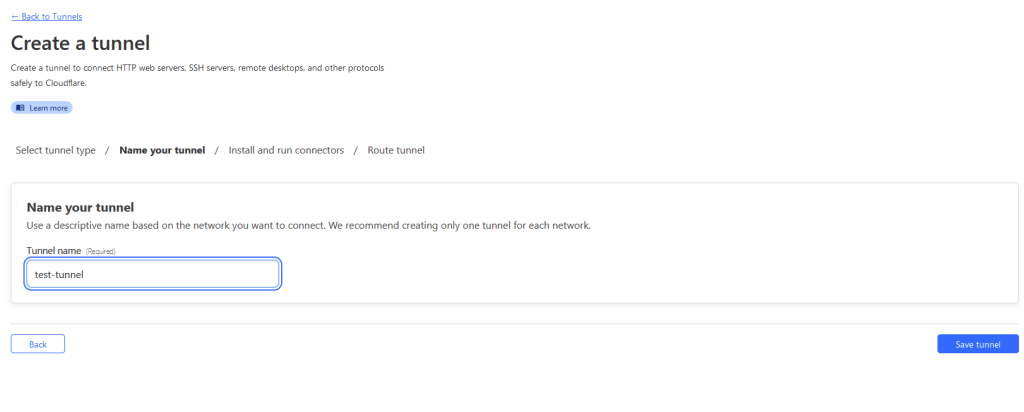
Give your tunnel a name and click the Save Tunnel button.
Then, on the screen that opens, as I mentioned before, since I installed a Debian server, select Debian and wait for the following screen to appear.
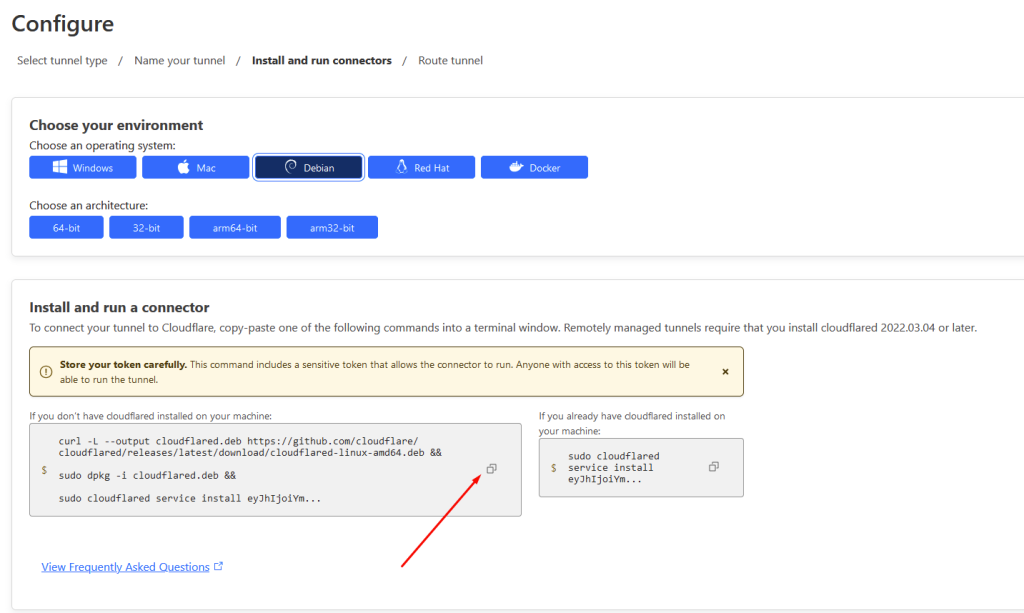
Here it offers 2 options. The first is if cloudflared is not installed on your server, it both installs it and makes the tunnel settings. The second is if cloudflared is already installed, it only makes the tunnel settings. Since we have not installed cloudflared on our server before, we click on the copy button in the text block on the left and run the command we obtained on our server that we connect to via SSH.
After running the command on our server, we will get an image like the one below.
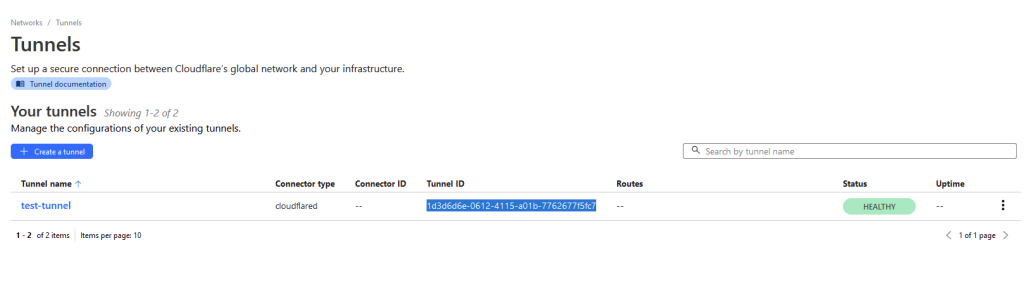
This means that our tunnel is working properly.
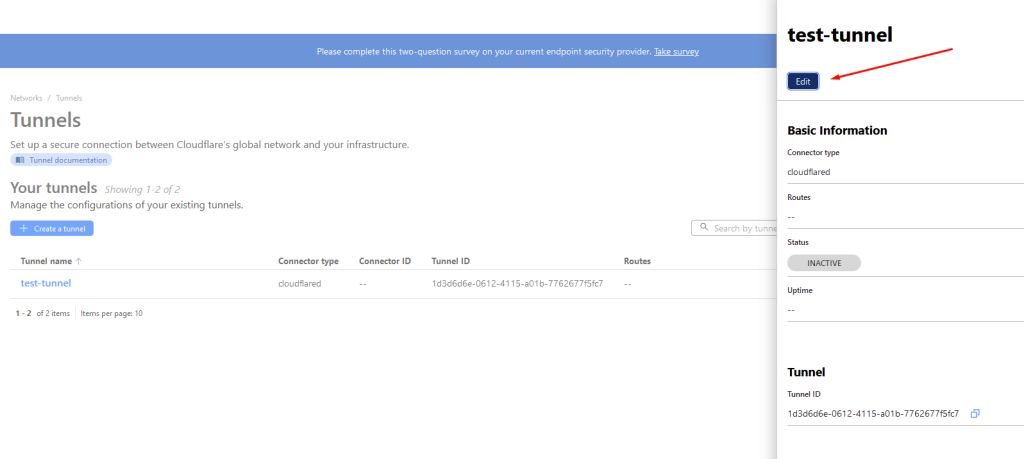
Then, we click on our tunnel and click on the Edit button from the menu that opens on the side.
From the screen that opens, we click on the Public Hostname option and click on the Add a public hostname button.
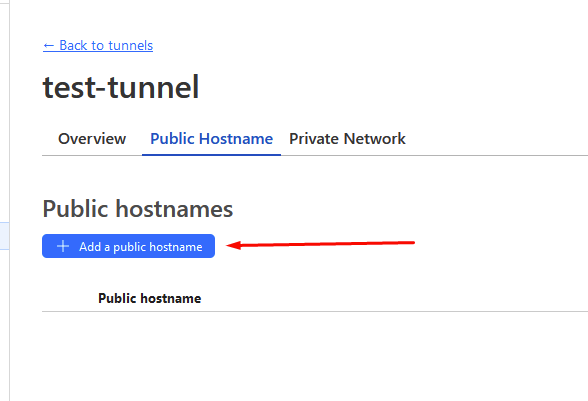
Here we will direct our coolify portal to the screen that opens.
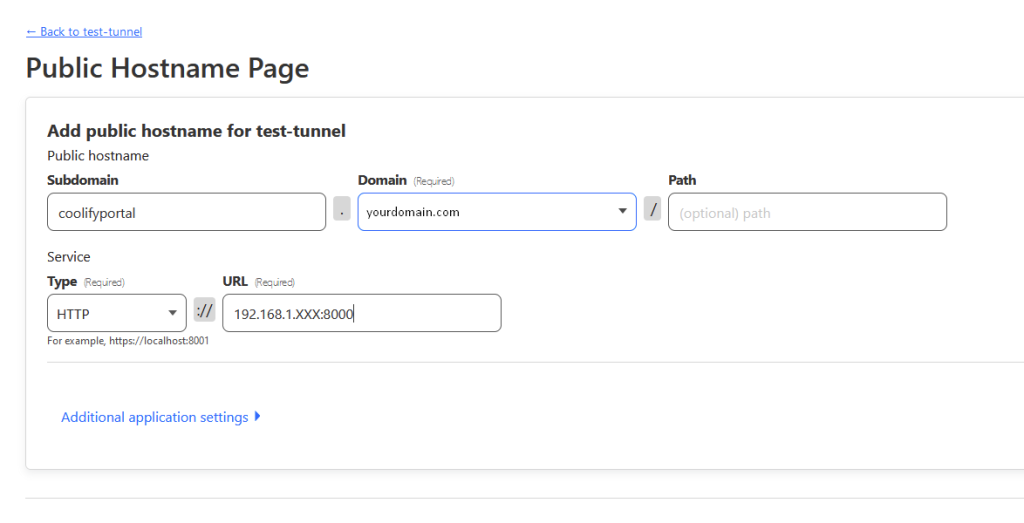
After the process is completed, if we click on the Save hostname button and the domain settings are made correctly and cloudflared continues to work healthily, you can now access the portal from outside via coolifyportal.yourdomain.com and cloudflared provides all the security here, including SSL, in a proxied manner free of charge.
Coolify Project Creation and Azure DevOps SSH Key Settings
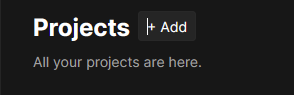
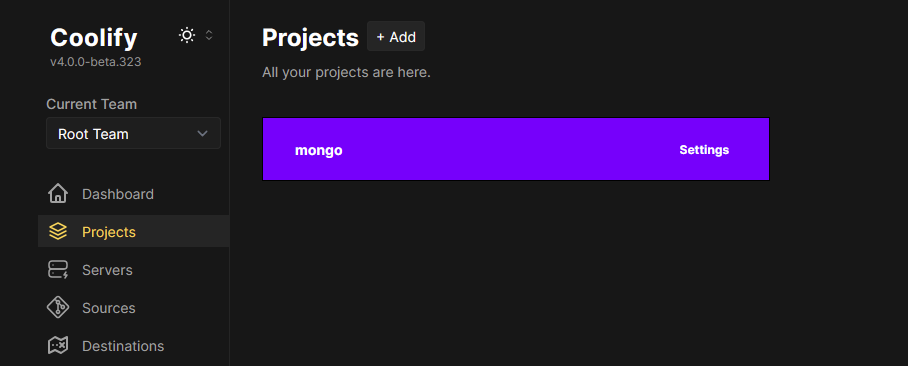
After accessing the portal, you can create a new project for yourself. To do this, click on Projects in the left menu and click on the +Add button at the top of the screen that opens.
Name your project and continue.
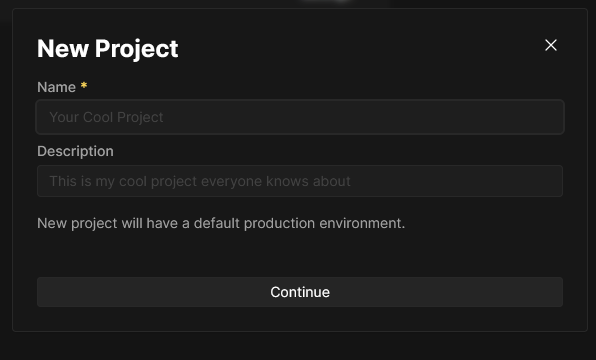
Your project is created. Now we can move on to our main topic, the deployment process. For this, we first need to generate an SSH key.
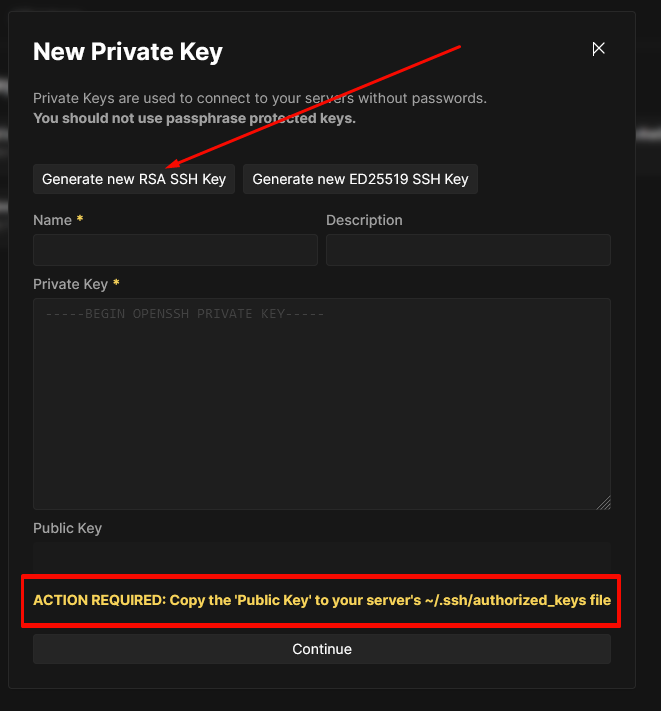
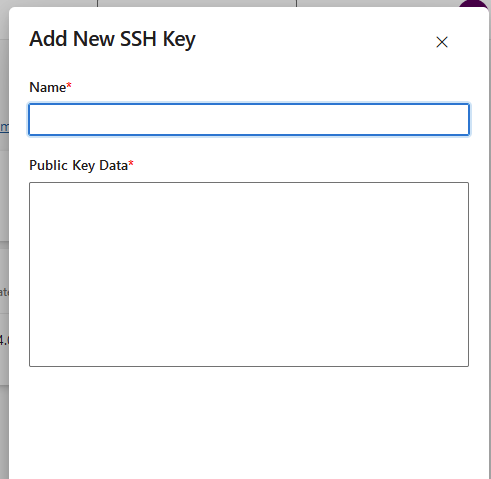
Click on Keys & Tokens in the left menu and then click on the Private Keys +Add button.
Follow the instructions to create an SSH Key and add it to whichever Git portal you will use.
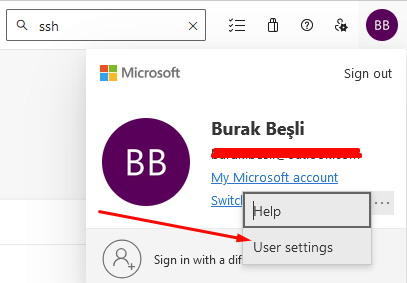
Since I use Azure DevOps, I will show you how it is done. First, create a .net core and an angular project repository in the Organization you created via Azure DevOps. Then click on the profile icon at the top right of the screen.
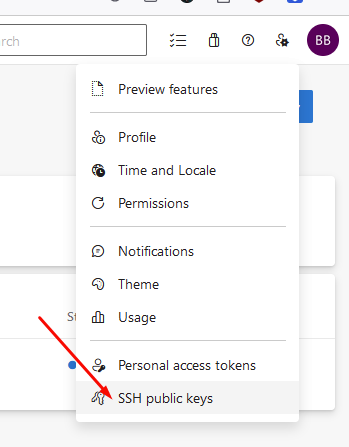
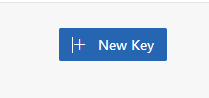
Give it a name and paste the Key you created via Coolify here. It will grant you a 1-year access right. Thus, you can communicate your projects on Coolify with Azure DevOps repositories. Otherwise, Coolify will not be able to access your repository.
MongoDB Server Installation
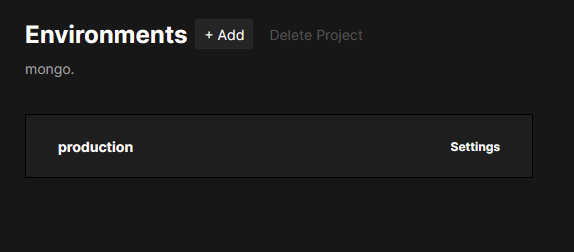
I created a mongodb as my first project.
When I click on it, I click on the production that opens.
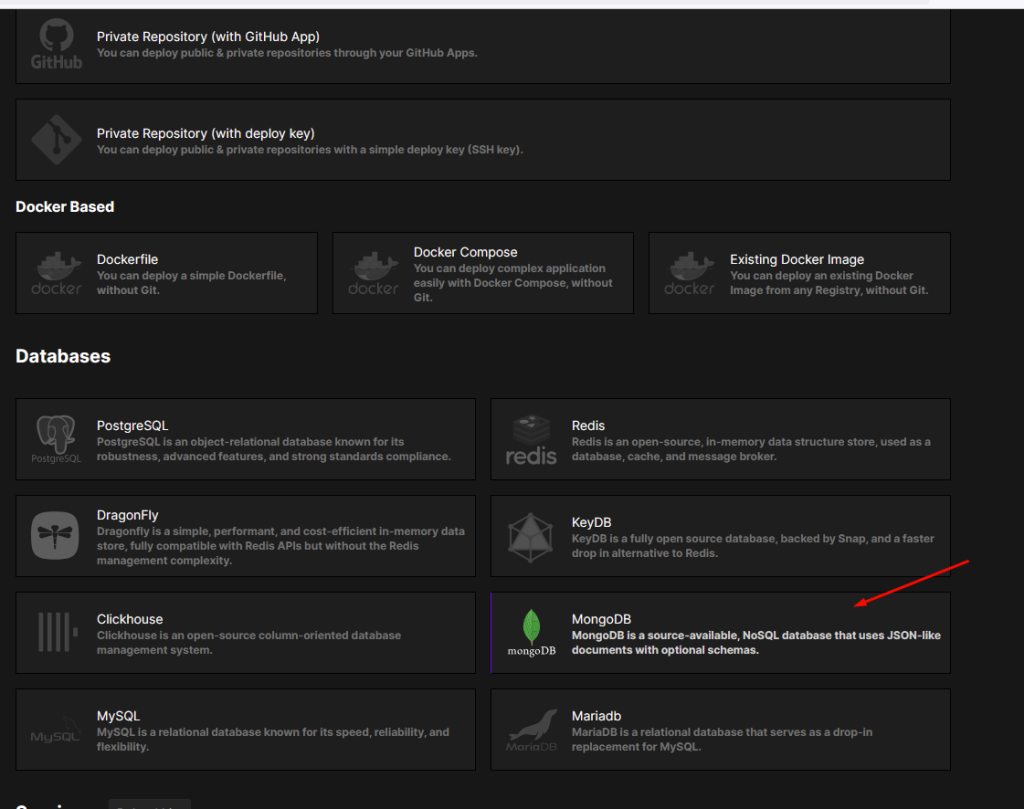
From here I click on the Resources + New button.
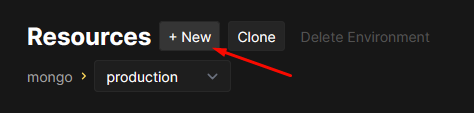
From the screen that opens, I select MongoDB.
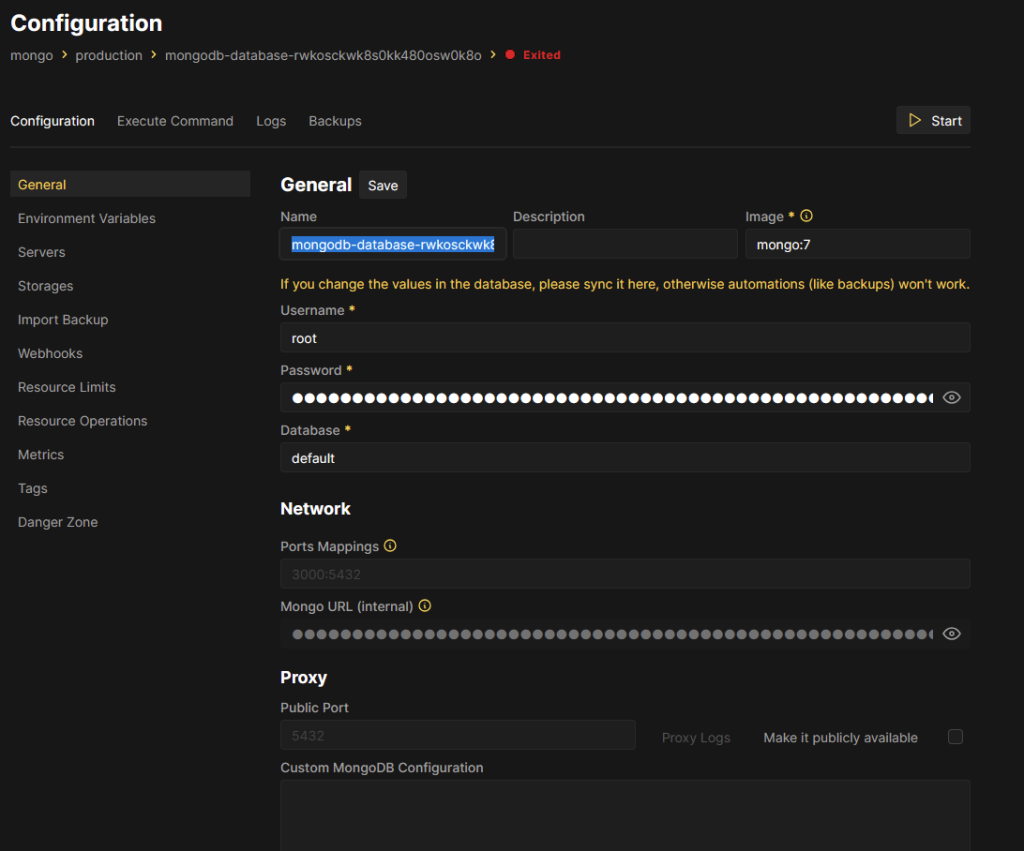
After determining the relevant port forwarding and cluster name, you need to enter the following information in the Custom MongoDB Configuration section below for the replicaSet. However, before this process, we must have at least 3 mongodb clusters. The key point here is that the ports of each one must be different from each other. For example: repl-1 27001, repl-2 27002, repl-3 27003

After creating our MongoDB clusters, we need a key file for our replicaSet. To do this, we need to run the following commands on our server via our SSH connection.
mkdir replica
cd replica
openssl rand -base64 756 > replica.key
chmod 400 replica.key
sudo chown 999:999 replica.key
Afterwards, we must enter the following code in the Custom MongoDB Configuration section for each cluster we created, as shown in the image below.
replication:
  replSetName: "rs0"
security:
  authorization: enabled
  keyFile: /tmp/mongodb/replica.key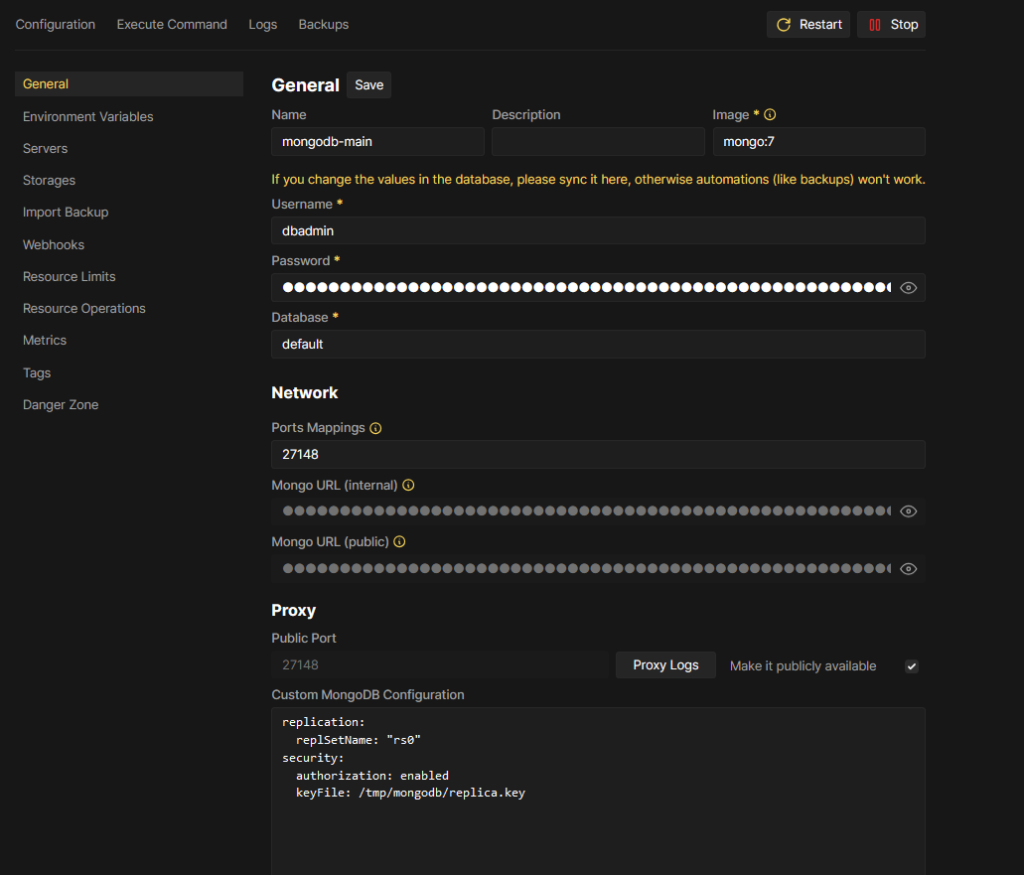
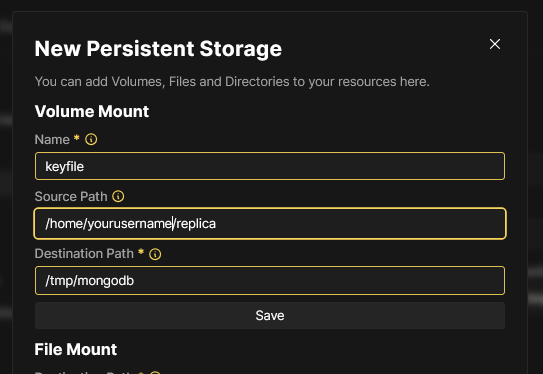
Afterwards, we need to add the following information to the Storages section on the left for each cluster.
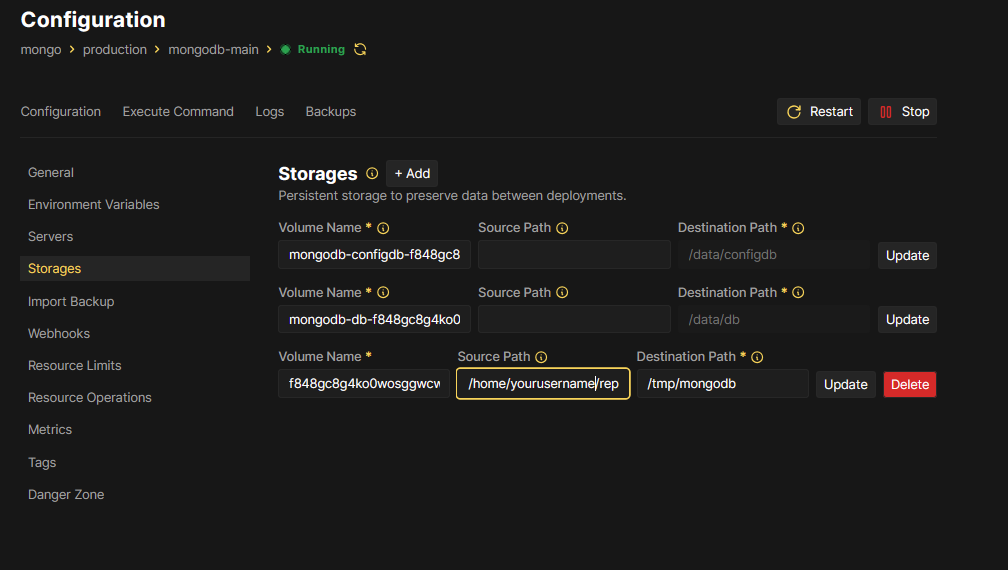
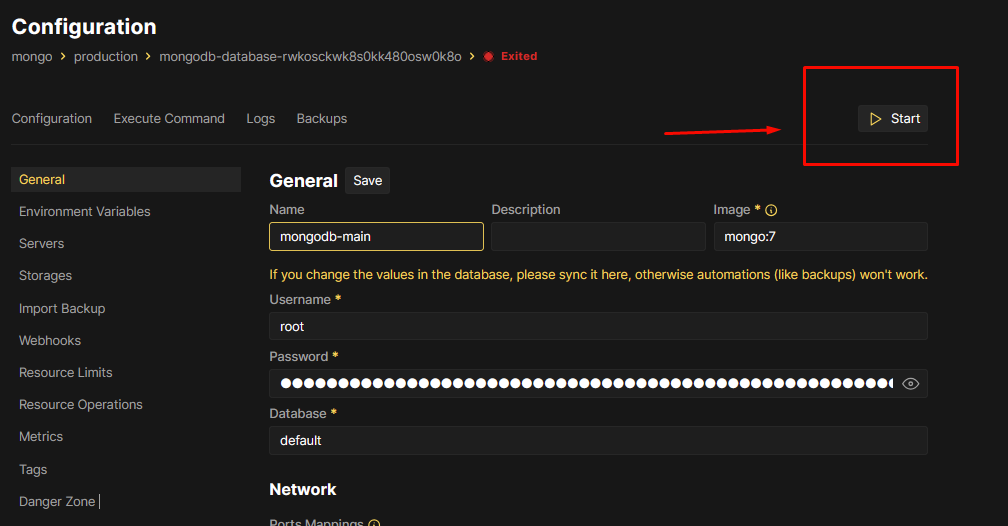
After all the settings are completed, we go into our clusters and Deploy our clusters by clicking Start.
Then, we need to initiate the replicaSet via mongosh for the clusters we created.


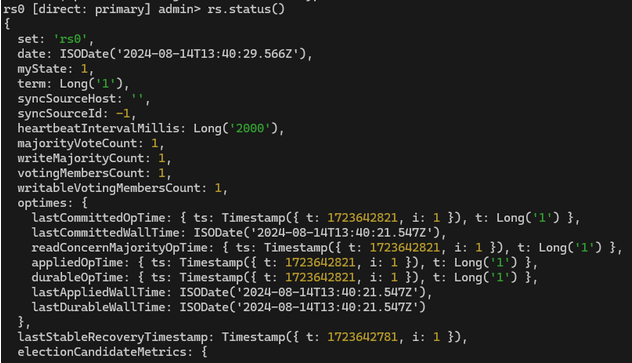
The commands are as follows: use admin > db.auth(“yourusername”,”yourpassword”) > rs.initiate() > rs.status()
For detailed information about replicaSet, you can click on this link. I also used it as a source.
Now our mongoDB is ready to use with replicaSet set. We will be given a link to access it from outside and locally.

Connect to the project from Azure DevOps Repository
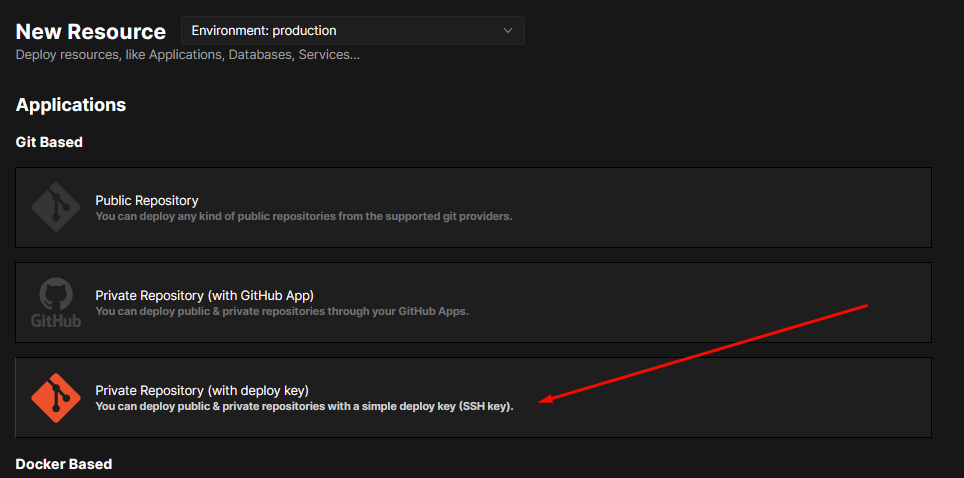
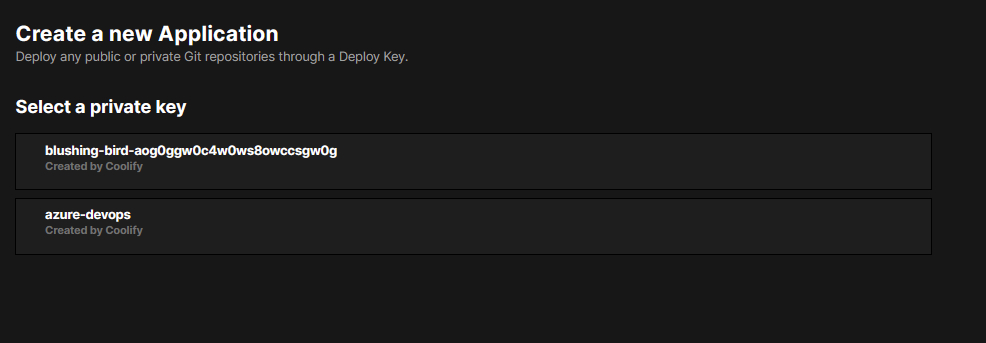
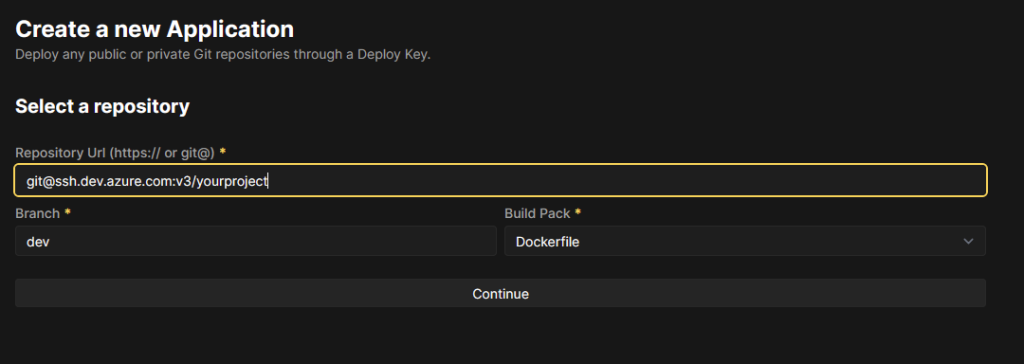
After creating a new project, we select the relevant repository option and continue, and from the screen below, we select the SSH key for which we created and linked it to our Azure account.
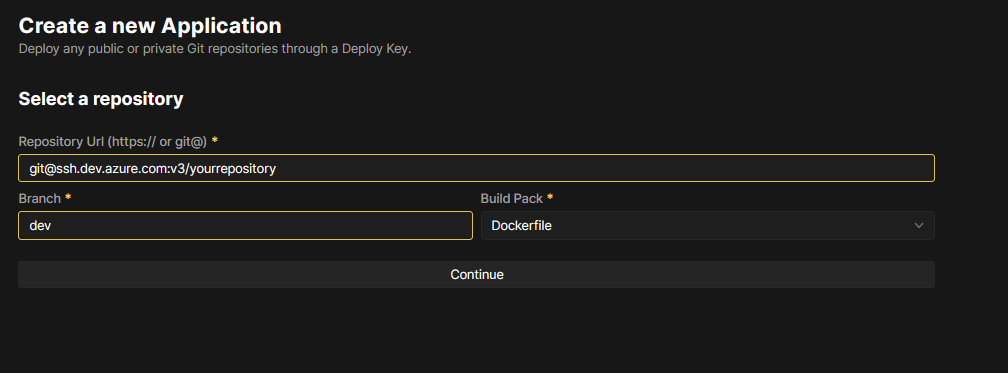
Then, after entering the repository and branch information, we click Continue.
My project architecture is as follows
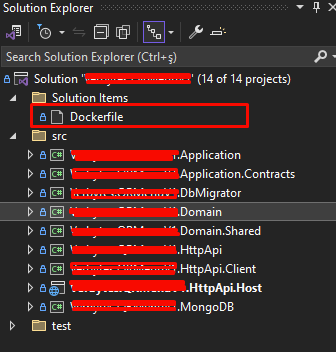
Since the project I want to publish is the HttpApi.Host project, I fill in the Dockerfile in the root path of the project as follows.
FROM mcr.microsoft.com/dotnet/aspnet:8.0 AS base
WORKDIR /app
EXPOSE 8095

FROM mcr.microsoft.com/dotnet/sdk:8.0 AS build
WORKDIR /src

# Generate the certificate and store it in the build context
RUN mkdir -p /src/certs && dotnet dev-certs https -v -ep /src/certs/authserver.pfx -p YOURSECRETKEY

ARG BUILD_CONFIGURATION=Release
COPY ["src/YourOrganization.ProjectName.HttpApi.Host/YourOrganization.ProjectName.HttpApi.Host.csproj", "src/YourOrganization.ProjectName.HttpApi.Host/"]
COPY ["src/YourOrganization.ProjectName.Application/YourOrganization.ProjectName.Application.csproj", "src/YourOrganization.ProjectName.Application/"]
COPY ["src/YourOrganization.ProjectName.Domain/YourOrganization.ProjectName.Domain.csproj", "src/YourOrganization.ProjectName.Domain/"]
COPY ["src/YourOrganization.ProjectName.Domain.Shared/YourOrganization.ProjectName.Domain.Shared.csproj", "src/YourOrganization.ProjectName.Domain.Shared/"]
COPY ["src/YourOrganization.ProjectName.Application.Contracts/YourOrganization.ProjectName.Application.Contracts.csproj", "src/YourOrganization.ProjectName.Application.Contracts/"]
COPY ["src/YourOrganization.ProjectName.HttpApi/YourOrganization.ProjectName.HttpApi.csproj", "src/YourOrganization.ProjectName.HttpApi/"]
COPY ["src/YourOrganization.ProjectName.MongoDB/YourOrganization.ProjectName.MongoDB.csproj", "src/YourOrganization.ProjectName.MongoDB/"]
RUN dotnet restore "./src/YourOrganization.ProjectName.HttpApi.Host/YourOrganization.ProjectName.HttpApi.Host.csproj"
COPY . .
WORKDIR "/src/src/YourOrganization.ProjectName.HttpApi.Host"
RUN dotnet build "./YourOrganization.ProjectName.HttpApi.Host.csproj" -c $BUILD_CONFIGURATION -o /app/build

FROM build AS publish
ARG BUILD_CONFIGURATION=Release
RUN dotnet publish "./YourOrganization.ProjectName.HttpApi.Host.csproj" -c $BUILD_CONFIGURATION -o /app/publish /p:UseAppHost=false

FROM base AS final
WORKDIR /app

# Copy the certificate from the build stage to the final image
COPY --from=build /src/certs/authserver.pfx /app/authserver.pfx

# Temporarily switch to root to change permissions
USER root
RUN chmod 644 /app/authserver.pfx

# Switch back to app user
USER app

# Copy the published app
COPY --from=publish /app/publish .

ENTRYPOINT ["dotnet", "YourOrganization.ProjectName.HttpApi.Host.dll"]
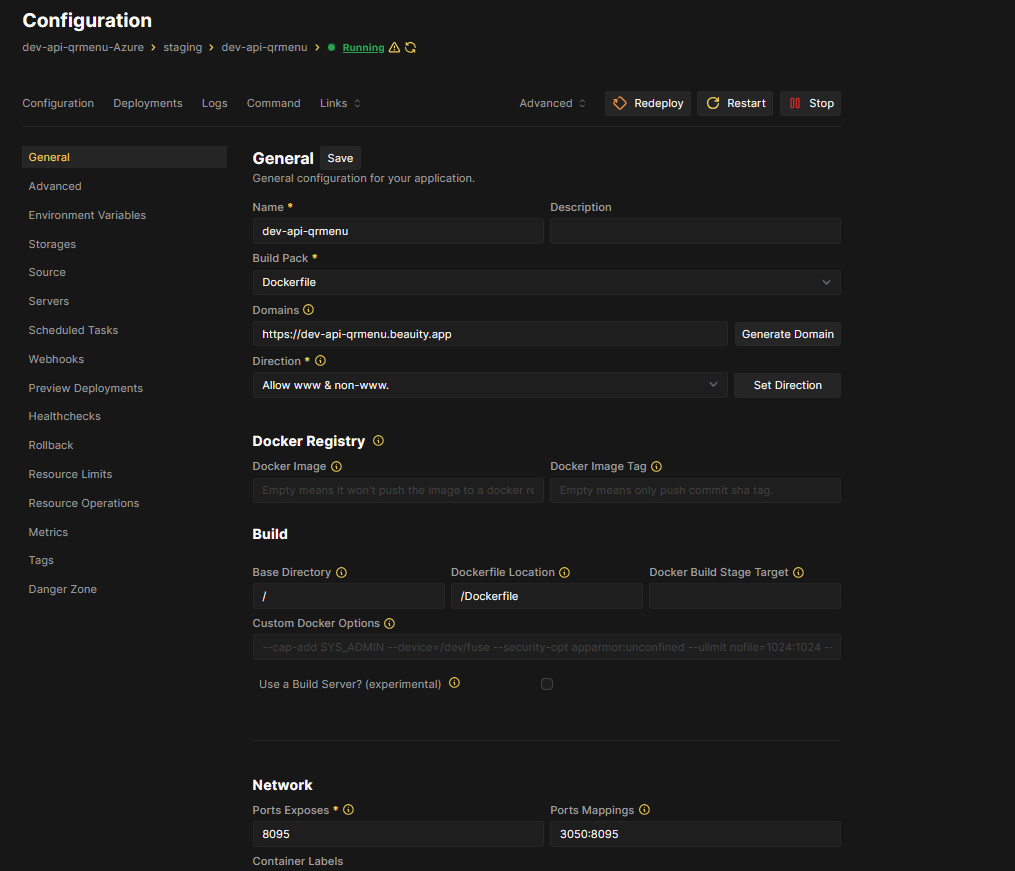
When we fill out our Dockerfile as above, the project will be ready to be deployed.
The final view of the project is as follows.
Additionally, Coolify offers the Key Vault feature of the portals that offer you cloud solutions free of charge, and you can manage it from the Environment Variables section.
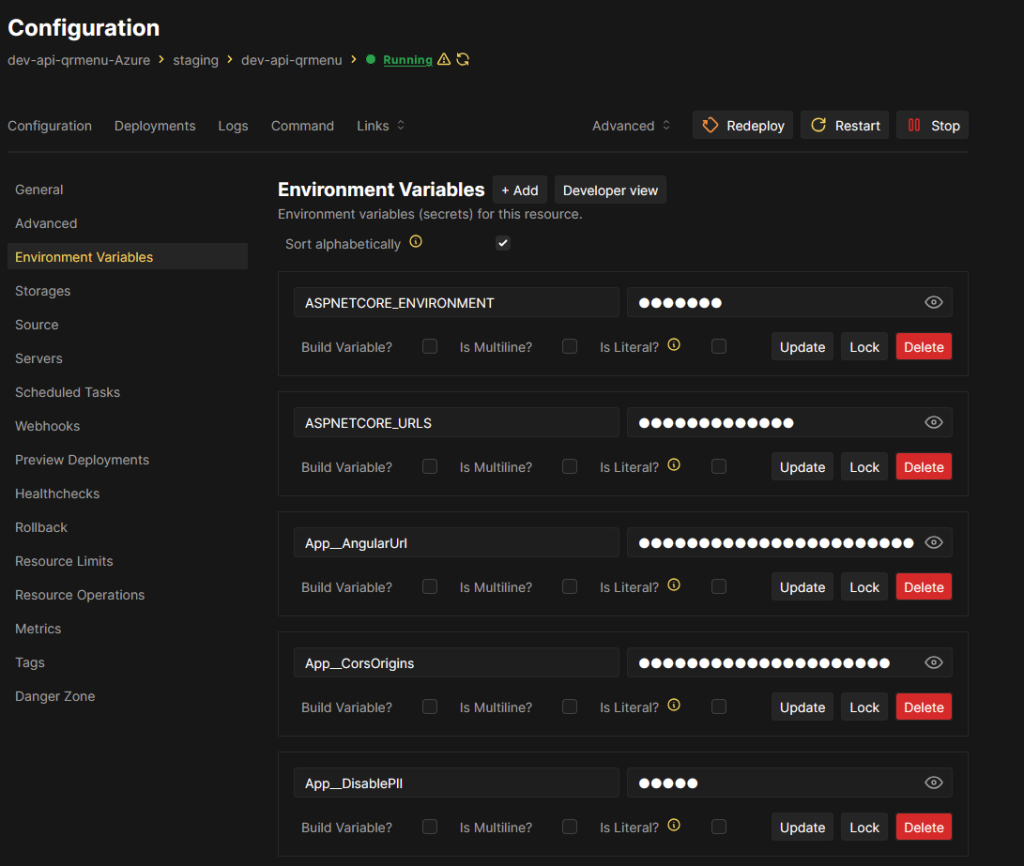
As above, you can store the keys that you think are important for your project here and include them when your project is built. The important point here is that if you keep your own DB on the same coolify, you should use Mongo URL (internal) in the DB connection you will give.

ConnectionStrings__Default=mongodb://youruser:yourpassword@f848gc8g4ko0wosggwcws4w8:27017/YourDbName?directConnection=true&replicaSet=rs0&authSource=adminAngular Project Deployment
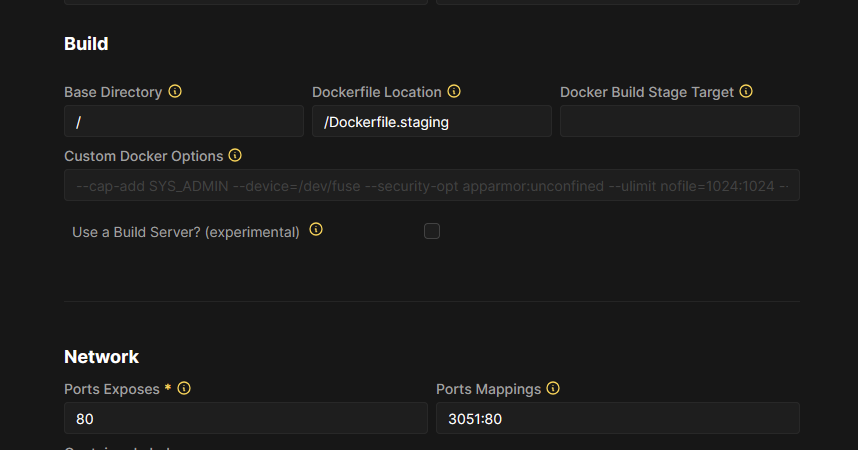
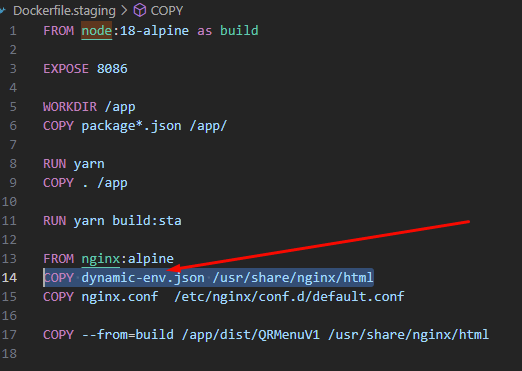
You need to create a new application and you need a Dockerfile in the root directory. Since I have separated my project into two different environments, I have 2 Dockerfiles in the root directory, one Dockerfile.staging and one Dockerfile.production. Therefore, it has separate content for both. I will be sharing what is needed for staging here.
My project files are as follows:
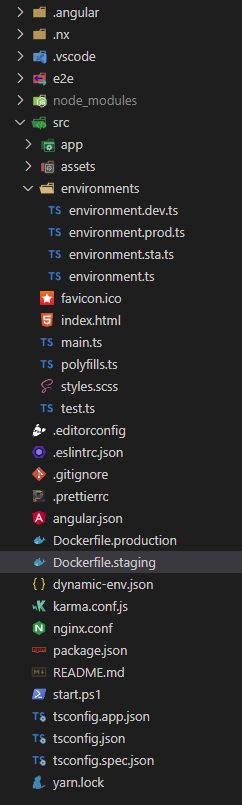
# Dockerfile.staging

FROM node:18-alpine as build

EXPOSE 8086

WORKDIR /app
COPY package*.json /app/

RUN yarn
COPY . /app

RUN yarn build:sta

FROM nginx:alpine
COPY dynamic-env.json /usr/share/nginx/html
COPY nginx.conf  /etc/nginx/conf.d/default.conf

COPY --from=build /app/dist/QRMenuV1 /usr/share/nginx/html
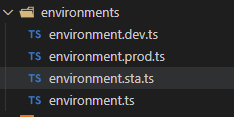
The important part here is that minor updates need to be made in angular.json and package.json. But first we need to create an environment file for staging.
For angular.json:
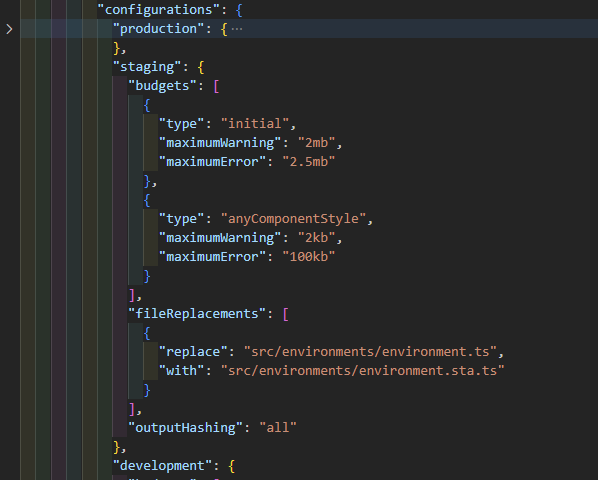
"staging": {
              "budgets": [
                {
                  "type": "initial",
                  "maximumWarning": "2mb",
                  "maximumError": "2.5mb"
                },
                {
                  "type": "anyComponentStyle",
                  "maximumWarning": "2kb",
                  "maximumError": "100kb"
                }
              ],
              "fileReplacements": [
                {
                  "replace": "src/environments/environment.ts",
                  "with": "src/environments/environment.sta.ts"
                }
              ],
              "outputHashing": "all"
            }
For package.json:
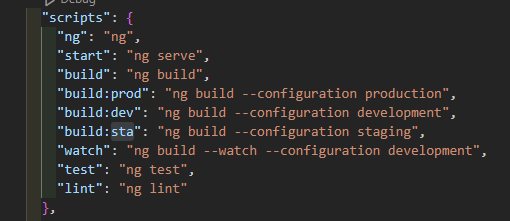
"build:sta": "ng build --configuration staging",And now it’s time for the final process. Now we can press the Start button in the upper right corner of the project we created in the Coolify portal to deploy our project. If you are using a “dynamic-env.json” file like me or a different file with a similar function, you should make the relevant modifications to your Dockerfile.
Thus, you can define variables in your project from the Environment Variables section via the Coolify portal.
In this article, I tried to tell you how to install MongoDB Server and make replicaSet settings via the Coolify portal with Docker, and how to deploy your .net core and angular projects. If you have any problems while doing this, you can ask your questions in the comments section or you can reach me from the links on my profile.
Be First to Comment